springmvc 源码分析(三) -- 自定义处理器映射器和自定义处理器适配器,以及自定义参数解析器
时间:2020-07-04 16:13:50
收藏:0
阅读:297
测试环境搭建: 本次搭建是基于springboot来实现的,代码在码云的链接:https://gitee.com/yangxioahui/thymeleaf.git
DispatcherServlet核心流程在上一篇源码分析已经做了详细讲解 了,参考: https://www.cnblogs.com/yangxiaohui227/p/13229413.html
1. 自定义处理器映射器和处理器适配器:
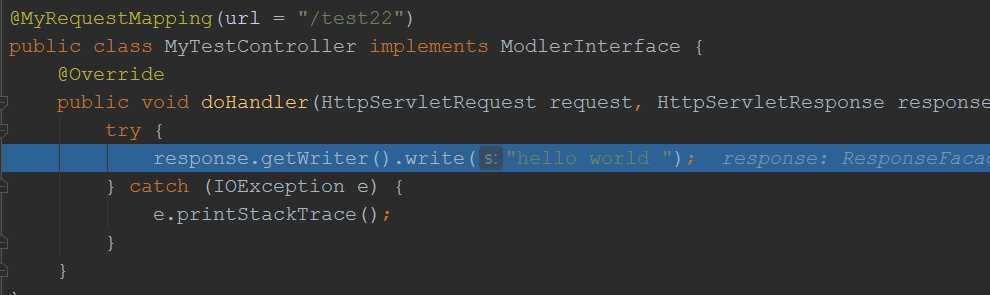
本次目标是使得我自定义的controller生效
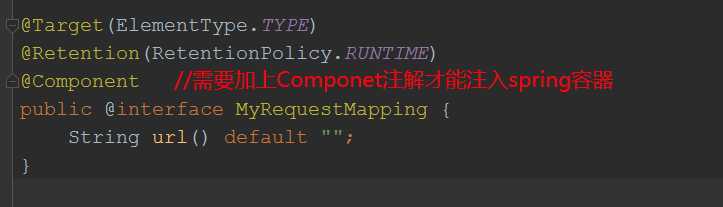

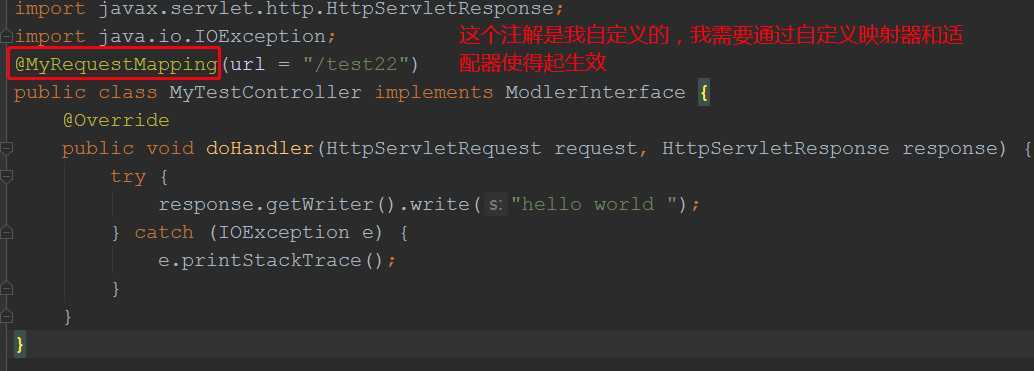
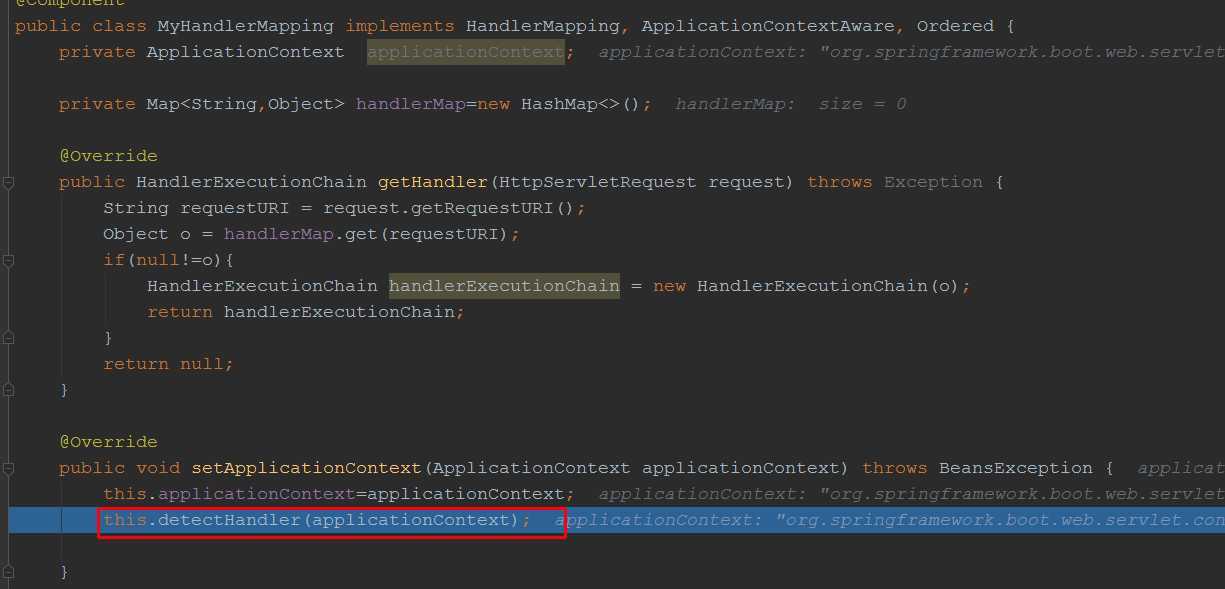
//自定义映射器,使得springmvc 可以通过/test22 找到我的MyTestController
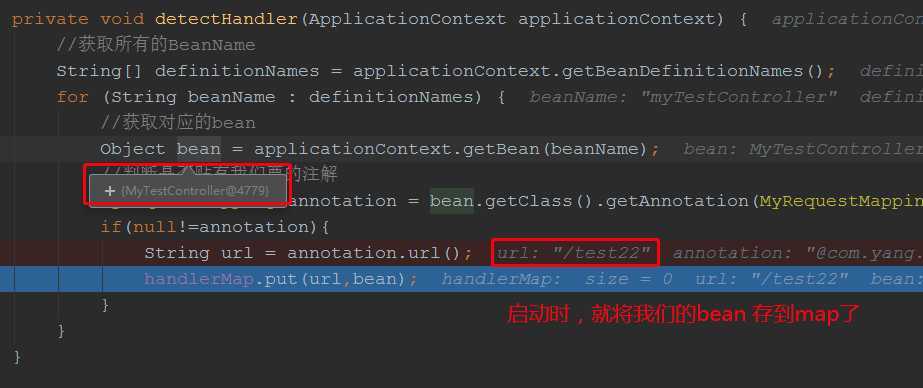
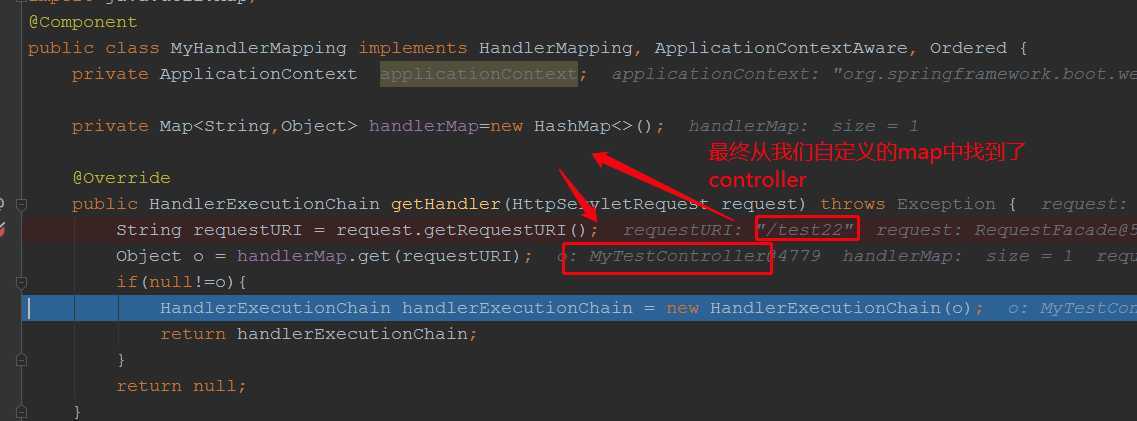
@Component
public class MyHandlerMapping implements HandlerMapping, ApplicationContextAware, Ordered {
    private ApplicationContext  applicationContext;

    private Map<String,Object> handlerMap=new HashMap<>();  //spring 在启动时,会将所有被我的@MyRequestMapping注解标注的bean 存到这里,例如我们定义的MyTestController

    @Override
    public HandlerExecutionChain getHandler(HttpServletRequest request) throws Exception {
        String requestURI = request.getRequestURI(); //从请求参数中拿到对应的url
        Object o = handlerMap.get(requestURI); //通过url或者handler
        if(null!=o){
            HandlerExecutionChain handlerExecutionChain = new HandlerExecutionChain(o);
            return handlerExecutionChain;
        }
        return null;
    }

    @Override
    public void setApplicationContext(ApplicationContext applicationContext) throws BeansException {
        this.applicationContext=applicationContext;
        this.detectHandler(applicationContext); //spring 容器创建该bean时会回调该方法

    }

    private void detectHandler(ApplicationContext applicationContext) {
        //获取所有的BeanName
        String[] definitionNames = applicationContext.getBeanDefinitionNames();
        for (String beanName : definitionNames) {
            //获取对应的bean
            Object bean = applicationContext.getBean(beanName);
            //判断是否贴有我们要的注解
            MyRequestMapping annotation = bean.getClass().getAnnotation(MyRequestMapping.class);
            if(null!=annotation){
                String url = annotation.url();
                handlerMap.put(url,bean);
            }
        }
    }

    @Override
    public int getOrder() {  //因为springmvc 中有很多HandlerMapping,只要其中一个匹配到对应的url,就会返回,所以我们要将这里的优先级设置最高
        return Ordered.HIGHEST_PRECEDENCE;
    }
}
自定义适配器:
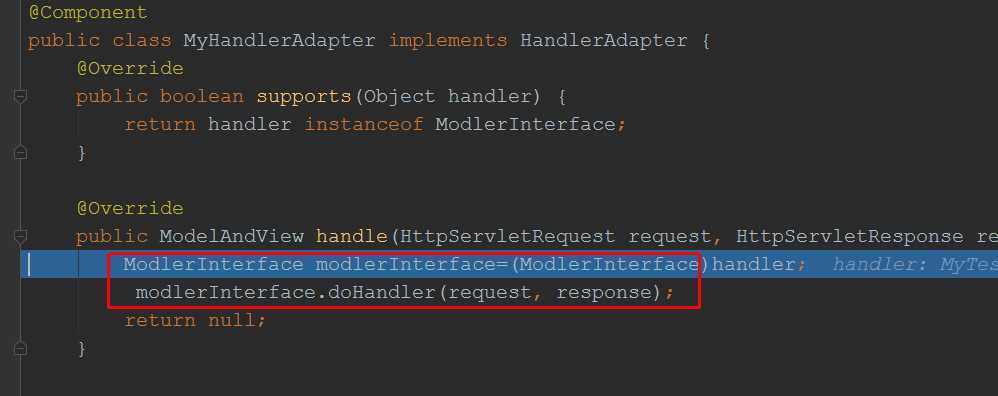
@Component
public class MyHandlerAdapter implements HandlerAdapter {
    @Override
    public boolean supports(Object handler) {
        return handler instanceof ModlerInterface; //我们定义的适配器,处理的类型就是ModlerInterface
    }

    @Override
    public ModelAndView handle(HttpServletRequest request, HttpServletResponse response, Object handler) throws Exception {
        ModlerInterface modlerInterface=(ModlerInterface)handler;
         modlerInterface.doHandler(request, response); //直接调用目标方法
        return null;
    }

    @Override
    public long getLastModified(HttpServletRequest request, Object handler) {
        return 0;
    }
}
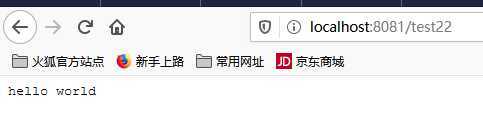
浏览器调用:
原理分析:
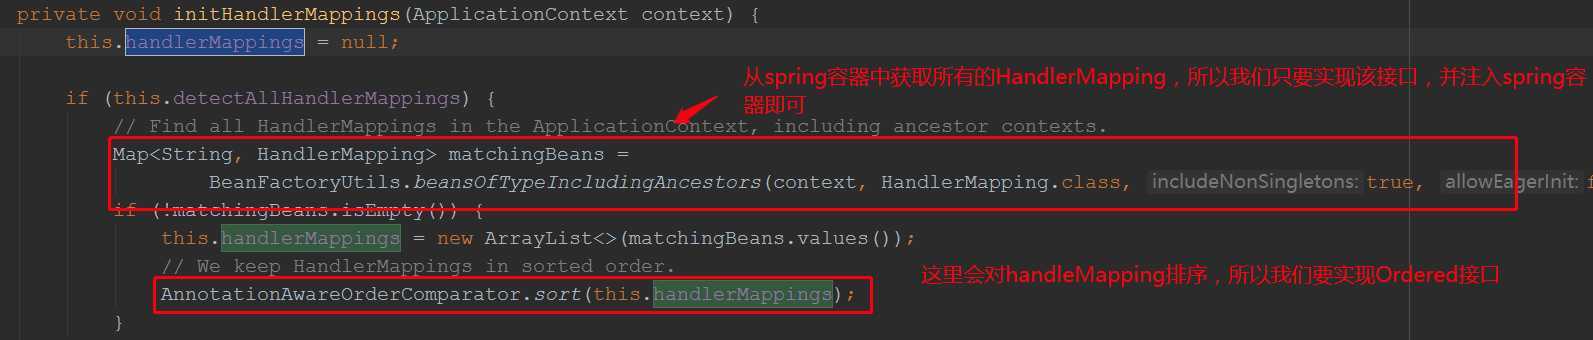
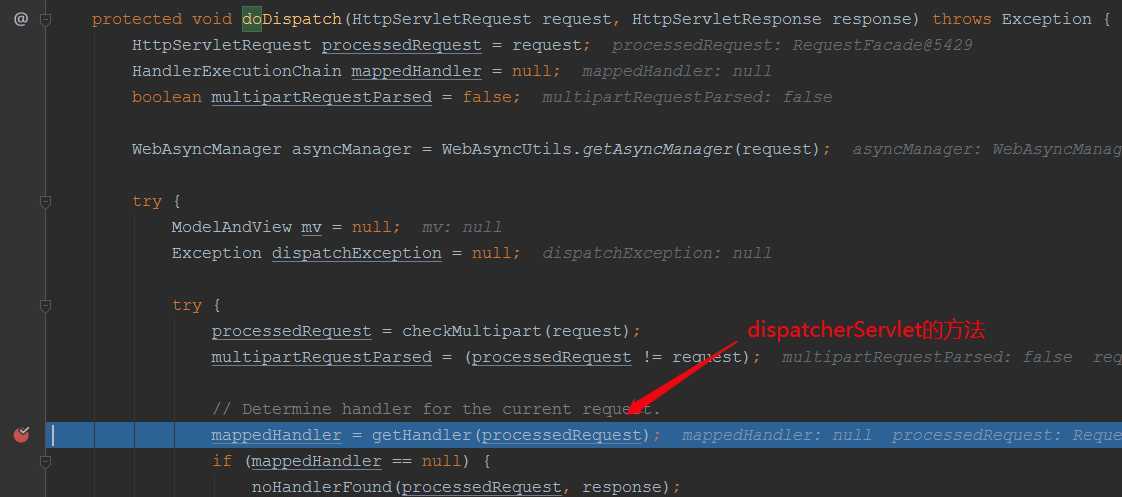
自定义映射器和自定义适配器添加到DispatcherServlet原理:
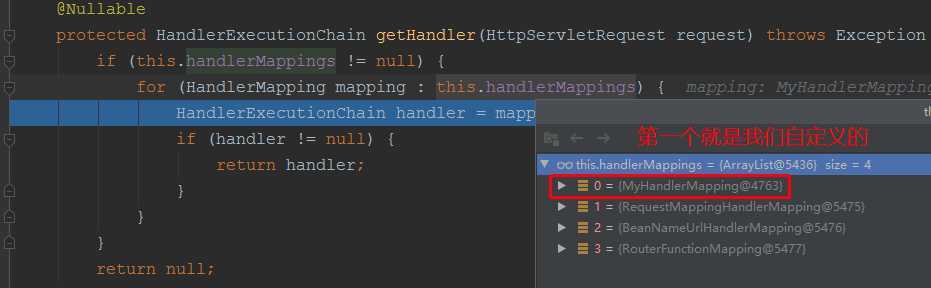
DispatcherServlet 的List<HandlerMapping> handlerMappings 初始化方法:
DispatcherServlet的List<HandlerAdapter> handlerAdapters 的原理同上;
我们再debug调试下自定义HandlerMapping的过程:
启动项目:
浏览器debug 调用我们的目标方法:
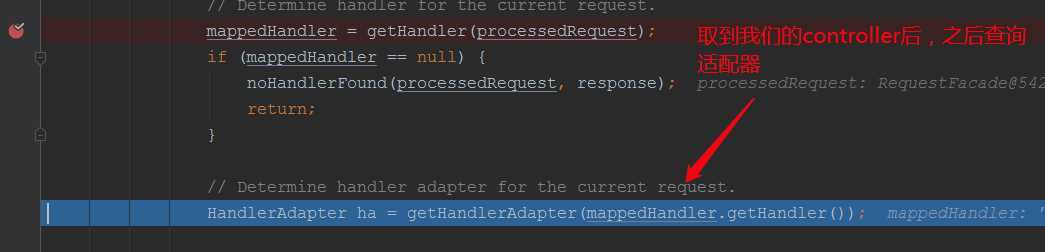
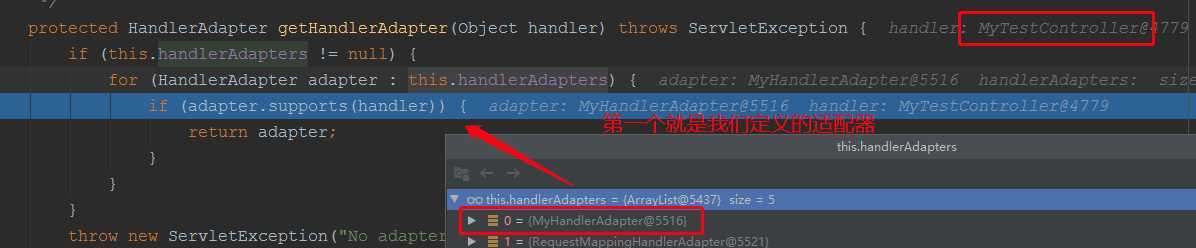

这样就找到我们的适配器了,之后通过适配器调用目标方法:

原文:https://www.cnblogs.com/yangxiaohui227/p/13235038.html
评论(0)