Pytest系列(16)- 分布式测试插件之pytest-xdist的详细使用
时间:2020-04-15 19:31:53
收藏:0
阅读:52
如果你还想从头学起Pytest,可以看看这个系列的文章哦!
https://www.cnblogs.com/poloyy/category/1690628.html
前言
- 平常我们功能测试用例非常多时,比如有1千条用例,假设每个用例执行需要1分钟,如果单个测试人员执行需要1000分钟才能跑完
- 当项目非常紧急时,会需要协调多个测试资源来把任务分成两部分,于是执行时间缩短一半,如果有10个小伙伴,那么执行时间就会变成十分之一,大大节省了测试时间
- 为了节省项目测试时间,10个测试同时并行测试,这就是一种分布式场景
- 同样道理,当我们自动化测试用例排常多的时候, 一条条按顺序执行会非常慢,pytest-xdist的出现就是为了让自动化测试用例可以分布式执行,从而节省自动化测试时间
- pytest-xdist是属于进程级别的并发
分布式执行用例的设计原则(重中之重的重点)
- 用例之间是独立的,用例之间没有依赖关系,用例可以完全独立运行【独立运行】
- 用例执行没有顺序,随机顺序都能正常执行【随机执行】
- 每个用例都能重复运行,运行结果不会影响其他用例【不影响其他用例】
插件安装
pip3 install pytest-xdist -i http://pypi.douban.com/simple/ --trusted-host pypi.douban.com
pytest-xdist通过一些独特的测试执行模式扩展了pytest
- 测试运行并行化:如果有多个CPU或主机,则可以将它们用于组合的测试运行。 这样可以加快开发速度或使用远程计算机的特殊资源。
- --looponfail:在子进程中重复运行测试。 每次运行之后,pytest都会等到项目中的文件更改后再运行之前失败的测试。 重复此过程,直到所有测试通过,然后再次执行完整运行。
- 跨平台覆盖:您可以指定不同的Python解释程序或不同的平台,并在所有这些平台上并行运行测试。
快速入门
这是运行代码的包结构
14xdist是项目文件夹名称
│  conftest.py
│  test_1.py
│  __init__.py
│
├─test_51job
│  │  conftest.py
│  │  test_case1.py
│  │  __init__.py
│
├─test_toutiao
│  │  test_case2.py
│
├─test_weibo
│  │  conftest.py
│  │  test_case3.py
│  │  __init__.py
│
具体代码
最外层的conftest.py


# 外层conftest.py

@pytest.fixture(scope="session")
def login():
    print("====登录功能,返回账号,token===")
    name = "testyy"
    token = "npoi213bn4"
    yield name, token
    print("====退出登录!!!====")
最外层的test_1.py
import pytest


@pytest.mark.parametrize("n", list(range(5)))
def test_get_info(login, n):
    sleep(1)
    name, token = login
    print("***基础用例:获取用户个人信息***", n)
    print(f"用户名:{name}, token:{token}")
test_51job包下的conftest.py
import pytest


@pytest.fixture(scope="module")
def open_51(login):
    name, token = login
    print(f"###用户 {name} 打开51job网站###")
test_51job包下的test_case1.py
from time import sleep

import pytest


@pytest.mark.parametrize("n", list(range(5)))
def test_case2_01(open_51, n):
    sleep(1)
    print("51job,列出所有职位用例", n)


@pytest.mark.parametrize("n", list(range(5)))
def test_case2_02(open_51, n):
    sleep(1)
    print("51job,找出所有python岗位", n)
test_toutiao包下的test_case2.py
from time import sleep

import pytest


@pytest.mark.parametrize("n", list(range(5)))
def test_no_fixture(login, n):
    sleep(1)
    print("==没有__init__测试用例,我进入头条了==", login)
test_weibo包下的conftest.py
import pytest


@pytest.fixture(scope="function")
def open_weibo(login):
    name, token = login
    print(f"&&& 用户 {name} 返回微博首页 &&&")
test_weibo包下的test_case3.py
from time import sleep

import pytest


@pytest.mark.parametrize("n", list(range(5)))
class TestWeibo:
    def test_case1_01(self, open_weibo, n):
        sleep(1)
        print("查看微博热搜", n)

    def test_case1_02(self, open_weibo, n):
        sleep(1)
        print("查看微博范冰冰", n)
不使用分布式测试的命令和所需执行时间
pytest -s
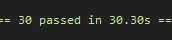
可以看到,执行一条用例大概1s(因为每个用例都加了 sleep(1) ),一共30条用例,总共运行30s;那么如果有1000条用例,执行时间就真的是1000s
使用分布式测试的命令和所需执行时间
pytest -s -n auto

知识点
- 可以看到,最终运行时间只需要6s,我的电脑是真6核,假12核
- -n auto:可以自动检测到系统的CPU核数;从测试结果来看,检测到的是逻辑处理器的数量,即假12核
- 使用auto等于利用了所有CPU来跑用例,此时CPU占用率会特别高
可以指定需要多少个CPU来跑用例
pytest -s -n 2

pytest-xdist是可以和pytest-html很好的相结合
pytest -s -n auto --html=report.html --self-contained-html
pytest-xdist按照一定的顺序执行
pytest-xdist默认是无序执行的,可以通过 --dist 参数来控制顺序
--dist=loadscope
- 将按照同一个模块module下的函数和同一个测试类class下的方法来分组,然后将每个测试组发给可以执行的worker,确保同一个组的测试用例在同一个进程中执行
- 目前无法自定义分组,按类class分组优先于按模块module分组
--dist=loadfile
按照同一个文件名来分组,然后将每个测试组发给可以执行的worker,确保同一个组的测试用例在同一个进程中执行
如何让scope=session的fixture在test session中仅仅执行一次
pytest-xdist是让每个worker进程执行属于自己的测试用例集下的所有测试用例
这意味着在不同进程中,不同的测试用例可能会调用同一个scope范围级别较高(例如session)的fixture,该fixture则会被执行多次,这不符合scope=session的预期
如何解决?
虽然pytest-xdist没有内置的支持来确保会话范围的夹具仅执行一次,但是可以通过使用锁定文件进行进程间通信来实现。
小栗子
- 下面的示例只需要执行一次login(因为它是只需要执行一次来定义配置选项,等等)
- 当第一次请求这个fixture时,则会利用FileLock仅产生一次fixture数据
- 当其他进程再次请求这个fixture时,则会从文件中读取数据
import pytest
from filelock import FileLock


@pytest.fixture(scope="session")
def login():
    print("====登录功能,返回账号,token===")
    with FileLock("session.lock"):
        name = "testyy"
        token = "npoi213bn4"
        # web ui自动化
        # 声明一个driver,再返回

        # 接口自动化
        # 发起一个登录请求,将token返回都可以这样写

    yield name, token
    print("====退出登录!!!====")
原文:https://www.cnblogs.com/poloyy/p/12694861.html
评论(0)