0018SpringBoot连接docker中的mysql并使用druid数据源
由于druid数据源自带监控功能,所以引用druid数据源
1、centos7中安装并启动docker
2、docker安装并启动mysql
3、pom.xml中引入druid依赖
4、application.yml中配置数据库连接及druid数据源信息
5、编写DruidConfig配置文件,绑定4中所配置的数据源信息
6、编写HelloController用于访问
7、登录druid管理控制台
8、访问HelloController中的hello方法,并在druid控制台中查看
具体实现如下:
1、centos7中安装并启动docker
yum install docker
systemctl start docker
2、docker安装并启动mysql
拉取:
docker pull mysql
启动:
docker run --name mysql01 -e MYSQL_ROOT_PASSWORD=root@123 -d mysql:latest
查看容器:
docker ps -a
停止容器:
docker stop 容器id
启动容器:
docker start 容器id
删除容器:
docker rm 容器id
3、pom.xml中引入druid依赖
<?xml version="1.0" encoding="UTF-8"?>
<project xmlns="http://maven.apache.org/POM/4.0.0" xmlns:xsi="http://www.w3.org/2001/XMLSchema-instance"
         xsi:schemaLocation="http://maven.apache.org/POM/4.0.0 https://maven.apache.org/xsd/maven-4.0.0.xsd">
    <modelVersion>4.0.0</modelVersion>
    <parent>
        <groupId>org.springframework.boot</groupId>
        <artifactId>spring-boot-starter-parent</artifactId>
        <version>2.2.1.RELEASE</version>
        <relativePath/> <!-- lookup parent from repository -->
    </parent>
    <groupId>com.myself</groupId>
    <artifactId>springboot-05-data-jdbc</artifactId>
    <version>0.0.1-SNAPSHOT</version>
    <name>springboot-05-data-jdbc</name>
    <description>Demo project for Spring Boot</description>

    <properties>
        <java.version>1.8</java.version>
    </properties>

    <dependencies>
        <dependency>
            <groupId>org.springframework.boot</groupId>
            <artifactId>spring-boot-starter-jdbc</artifactId>
        </dependency>


        <dependency>
            <groupId>org.springframework.boot</groupId>
            <artifactId>spring-boot-starter-web</artifactId>
        </dependency>
        <dependency>
            <groupId>mysql</groupId>
            <artifactId>mysql-connector-java</artifactId>
            <version>8.0.18</version>
        </dependency>
        <dependency>
            <groupId>org.springframework.boot</groupId>
            <artifactId>spring-boot-starter-test</artifactId>
            <scope>test</scope>
            <!--必须将此段注释调用才能使用@Runwith注解-->
            <!--<exclusions>
                <exclusion>
                    <groupId>org.junit.vintage</groupId>
                    <artifactId>junit-vintage-engine</artifactId>
                </exclusion>
            </exclusions>-->
        </dependency>
        <!--用于热部署-->
        <dependency>
            <groupId>org.springframework.boot</groupId>
            <artifactId>spring-boot-devtools</artifactId>
        </dependency>
        <!--引入druid数据源-->
        <!-- https://mvnrepository.com/artifact/com.alibaba/druid -->
        <dependency>
            <groupId>com.alibaba</groupId>
            <artifactId>druid</artifactId>
            <version>1.1.8</version>
        </dependency>
    </dependencies>

    <build>
        <plugins>
            <plugin>
                <groupId>org.springframework.boot</groupId>
                <artifactId>spring-boot-maven-plugin</artifactId>
            </plugin>
        </plugins>
    </build>

</project>
4、application.yml中配置数据库连接及druid数据源信息
spring:
  datasource:
    username: root
    password: root@123
    url: jdbc:mysql://127.0.0.1:3306/jdbc?useUnicode=true&useSSL=false&characterEncoding=utf8&serverTimezone=UTC
    driver-class-name: com.mysql.cj.jdbc.Driver
    type: com.alibaba.druid.pool.DruidDataSource

    initialSize: 5
    minIdle: 5
    maxActive: 20
    maxWait: 60000
    timeBetweenEvictionRunsMillis: 60000
    minEvictableIdleTimeMillis: 300000
    validationQuery: SELECT 1 FROM DUAL
    testWhileIdle: true
    testOnBorrow: false
    testOnReturn: false
    poolPreparedStatements: true
    #   配置监控统计拦截的filters,去掉后监控界面sql无法统计,‘wall‘用于防火墙
    #filters: stat,wall,log4j
    maxPoolPreparedStatementPerConnectionSize: 20
    useGlobalDataSourceStat: true
    connectionProperties: druid.stat.mergeSql=true;druid.stat.slowSqlMillis=500
  #    schema:
  #      - classpath:department.sql
5、编写DruidConfig配置类,绑定4中所配置的数据源信息
package com.myself.springboot05datajdbc.config;

import com.alibaba.druid.pool.DruidDataSource;
import com.alibaba.druid.support.http.StatViewServlet;
import com.alibaba.druid.support.http.WebStatFilter;
import org.springframework.boot.context.properties.ConfigurationProperties;
import org.springframework.boot.web.servlet.FilterRegistrationBean;
import org.springframework.boot.web.servlet.ServletRegistrationBean;
import org.springframework.context.annotation.Bean;
import org.springframework.context.annotation.Configuration;

import javax.sql.DataSource;
import java.util.Arrays;
import java.util.HashMap;
import java.util.Map;

@Configuration
public class DruidConfig {
    @ConfigurationProperties(prefix = "spring.datasource")
    @Bean
    public DataSource druid(){
        return  new DruidDataSource();
    }

    //配置Druid的监控
    //1、配置一个管理后台的Servlet
    @Bean
    public ServletRegistrationBean statViewServlet(){
        ServletRegistrationBean bean = new ServletRegistrationBean(new StatViewServlet(), "/druid/*");
        Map<String,String> initParams = new HashMap<>();

        initParams.put("loginUsername","admin");
        initParams.put("loginPassword","123456");
        initParams.put("allow","");//默认就是允许所有访问
        initParams.put("deny","192.168.15.21");

        bean.setInitParameters(initParams);
        return bean;
    }


    //2、配置一个web监控的filter
    @Bean
    public FilterRegistrationBean webStatFilter(){
        FilterRegistrationBean bean = new FilterRegistrationBean();
        bean.setFilter(new WebStatFilter());

        Map<String,String> initParams = new HashMap<>();
        initParams.put("exclusions","*.js,*.css,/druid/*");

        bean.setInitParameters(initParams);

        bean.setUrlPatterns(Arrays.asList("/*"));

        return  bean;
    }
}
6、编写HelloController用于访问
package com.myself.springboot05datajdbc.controller;

import org.springframework.beans.factory.annotation.Autowired;
import org.springframework.jdbc.core.JdbcTemplate;
import org.springframework.web.bind.annotation.GetMapping;
import org.springframework.web.bind.annotation.RestController;

import java.util.List;
import java.util.Map;

@RestController
public class HelloController {
    @Autowired
    private JdbcTemplate jdbcTemplate;
    @GetMapping("/hello")
    public Map<String, Object> hello(){
        List<Map<String, Object>> lists = jdbcTemplate.queryForList("select * from department");
        return lists.get(0);
    }
}
7、登录druid管理控制台
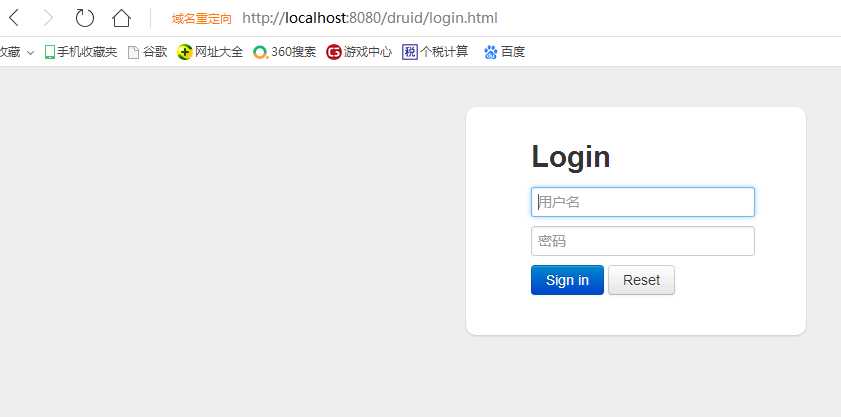
用户名密码为在步骤5的代码中写的
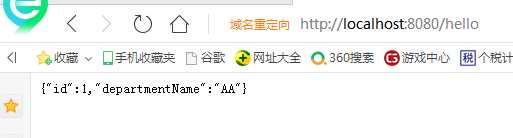
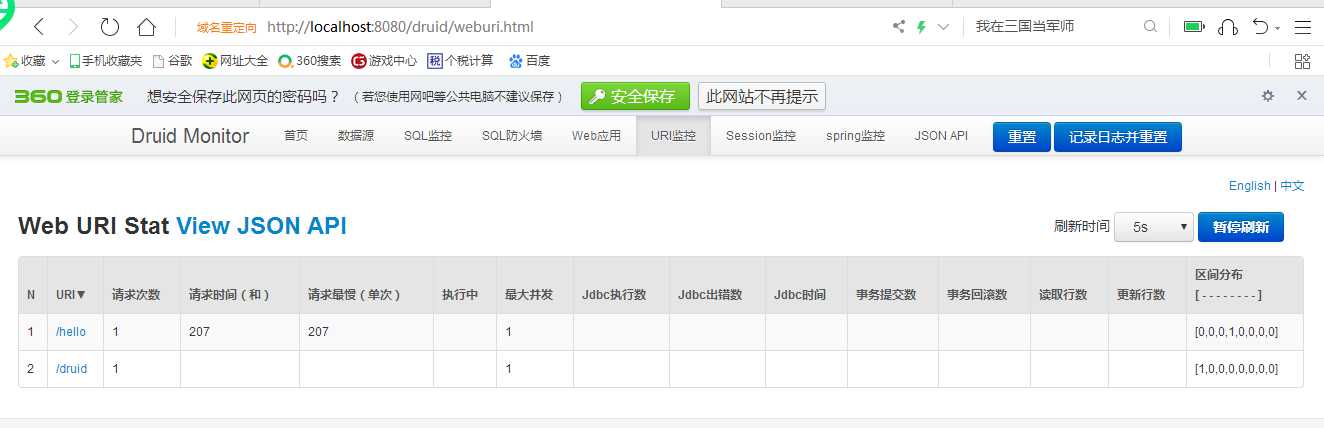
8、访问HelloController中的hello方法,并在druid控制台中查看
特别注意:在步骤4中配置数据源时,ip地址一定要是mysql容器的ip地址,而不能是docker所在虚拟机的地址,查看容器所在ip方法如下:
1、 docker ps 查看mysql的容器id
2、 docker exec -it xxx sh 进入容器终端
3、 cat /etc/hosts 显示ip所在的配置文件
如有理解不到之处,望指正!
原文:https://www.cnblogs.com/xiao1572662/p/11944171.html