Photoshop使用形状工具制作立体齿轮图标
时间:2015-11-24 23:36:15
收藏:0
阅读:395
图标效果

1.新建512*512画布,分别拉一条水平和垂直居中的参考线

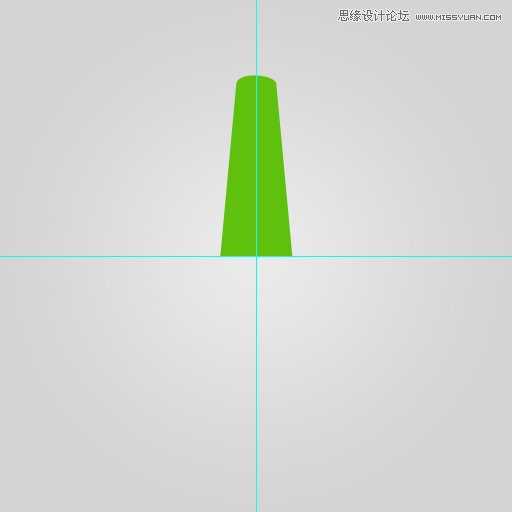
2.画一个竖向的矩形

3.在矩形顶端的两个锚点各向中间移动,并将顶部修饰为弧形
4.用变换工具,画出其余的11个角度

5.形状工具选择椭圆,画一个正圆切掉中间的部分

6.再用椭圆工具画中间更小的圆

7.重复5和6步骤至以下形状,并命名为设置

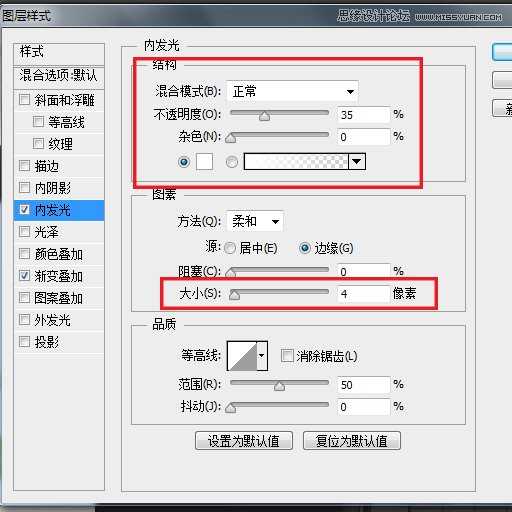
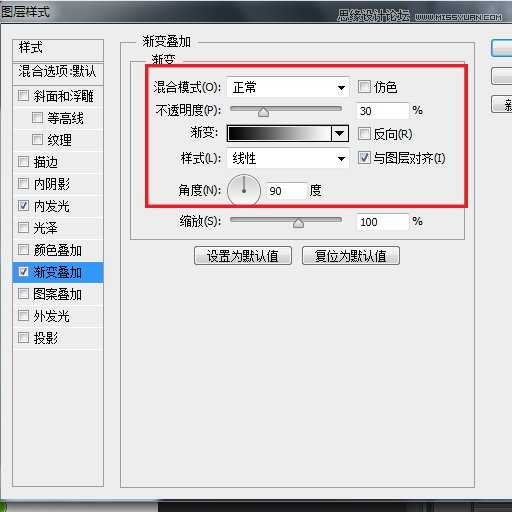
8.对设置图层添加图层样式,选择内发光和渐变叠加样式,参数如下

9.ctrl+J将设置复制一层,命名为设置暗部,颜色改为更深的色调,并移动到设置的下面,用方向键将设置暗部 往下移动4个像素

10.重复9步骤,多复制和移动几个设置暗部,如下图示

11.用钢笔工具画出亮面和更多的暗部

12.画出大面积的亮面,大功告成~

1.新建512*512画布,分别拉一条水平和垂直居中的参考线
2.画一个竖向的矩形
3.在矩形顶端的两个锚点各向中间移动,并将顶部修饰为弧形
4.用变换工具,画出其余的11个角度
5.形状工具选择椭圆,画一个正圆切掉中间的部分
6.再用椭圆工具画中间更小的圆
7.重复5和6步骤至以下形状,并命名为设置
8.对设置图层添加图层样式,选择内发光和渐变叠加样式,参数如下
9.ctrl+J将设置复制一层,命名为设置暗部,颜色改为更深的色调,并移动到设置的下面,用方向键将设置暗部 往下移动4个像素
10.重复9步骤,多复制和移动几个设置暗部,如下图示
11.用钢笔工具画出亮面和更多的暗部
12.画出大面积的亮面,大功告成~
原文:http://www.jb51.net/photoshop/226594.html
评论(0)